Can you use a tile saw, a Dremel tool, and wet/dry sand paper to start your adventure into becoming a gem cutter? Sure. Ancient Egyptian lapidaries used really basic tools (think sticks, strings, stones, sand and water) for millennia. But why would you want to when, for a few dollars—well maybe a little more than that—you can buy perfectly fine used or economical new lapidary tools that will last years, if not decades.
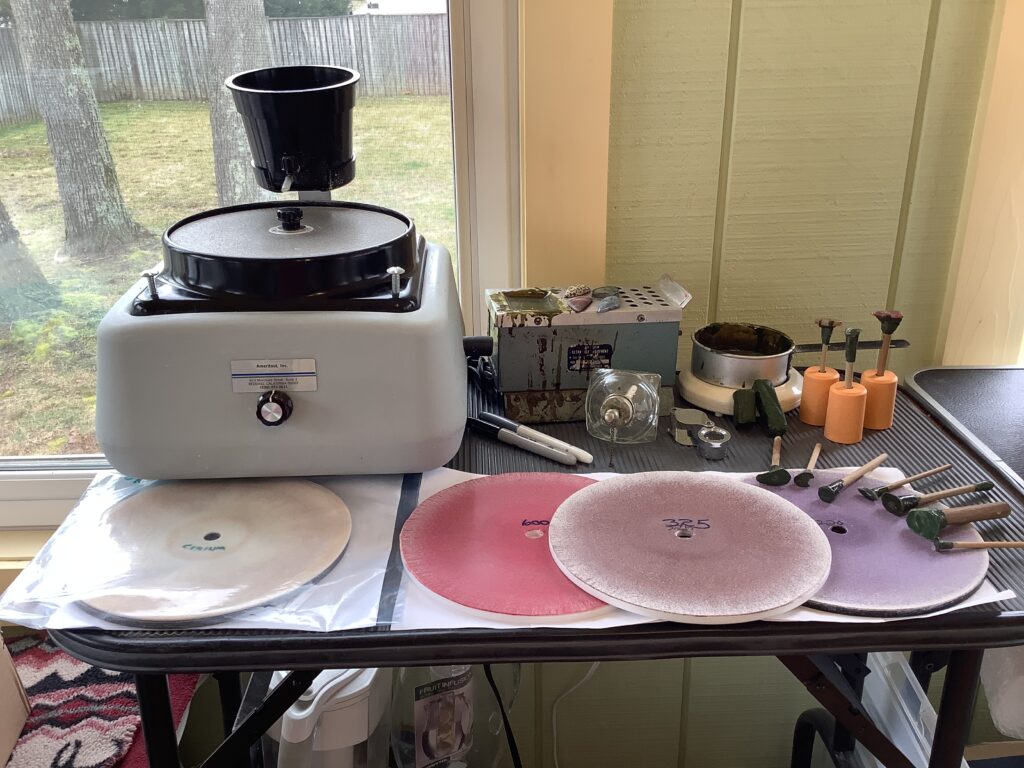
Whether you’re on a budget, tight on space, or both, start small. You don’t have to buy everything at once. If you’re cramped for space look for equipment that fits the space you have. The flat lap below is budget friendly and fits practically anywhere. Add a small trim saw and you have everything you need to trim, shape sand and polish your first gemstone.
When you see the price tag on something you really want, remember these tools are investments in yourself.
Here is my take on the 10 essential tools a new lapidary needs to start making great cabs.
Cabochon Machine

Here are a couple of ideas. First, check out eBay or the Lapidary Equipment Marketplace Facebook Group for used or reconditioned equipment. For something new yet affordable, I recommend the Ameritool flat lap (www.ameritoolonline.com). I have the 8-inch machine although the 6-inch is less expensive and is easy to convert to the 8 inch. The basic package will get you started; I have all the laps for diamond and oxide polishing compounds, but you don’t need them to start.
Combination machines provide both a trim saw and cabbing capabilities. They come in many configurations and prices. The potential downsides for combo units are: they tend to be much more expensive, even used, and they aren’t suitable for apartments or small spaces. But, if you think one might suit your needs, I recommend a seller that specializes in lapidary equipment (I suggest Kingsley North for its customer service, and product selection).
(Tip: Avoid the Asian vendors from China and India especially the really cheap stuff on Amazon. It truly is terrible. Remember, if the price sounds too good to be true—IT IS! There is a whole lot of technical stuff like bearing tolerances and how true the shaft is, etc. that I won’t go into here. Just don’t bother. Okay?)
Trim Saw
There’s no getting around it. Trim saws are expensive even used. So, although a trim saw is essential, you can get away without one for a while, if you limit yourself to small stones and slabs or you join a lapidary club or you know someone who will let you use their trim saw. But eventually what you’ll need is a 6-inch trim saw.
For me, my 6- inch trim saw is part of ancient 6-inch, 2 wheel cabber with flat lapping capability at the other end. (I know the thing had to be from the 50s or 60s when I brought it home in 2008.)
Starting cost for a new trim saw will be about $350 plus a blade which will add around $20 for a good entry level one, although a blade might be included.
You might be able to find a used combination unit with a 6-inch trim saw or a stand-alone trim saw from Facebook’s Lapidary Marketplace or eBay. If you’re cramped for space, I suggest looking at a Hi-Tech. It great for small rocks and slabs.
(Tip: I do not recommend a wet tile saw! There are a number of reasons from the kerf of the tile saw blade to the high speed of the motor. All of which I plan to cover in a separate article on saws. Do people use them? Yes. Does that make it less of a bad idea? No. Lapidary saws were invented for a reason.)
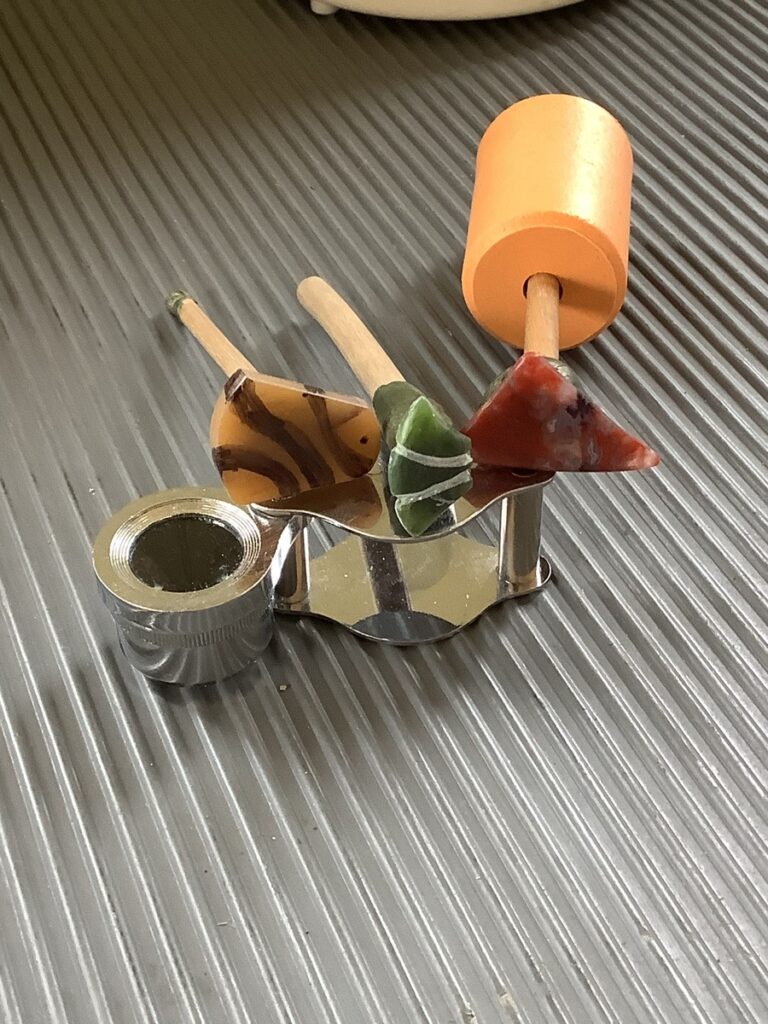
Dop Sticks
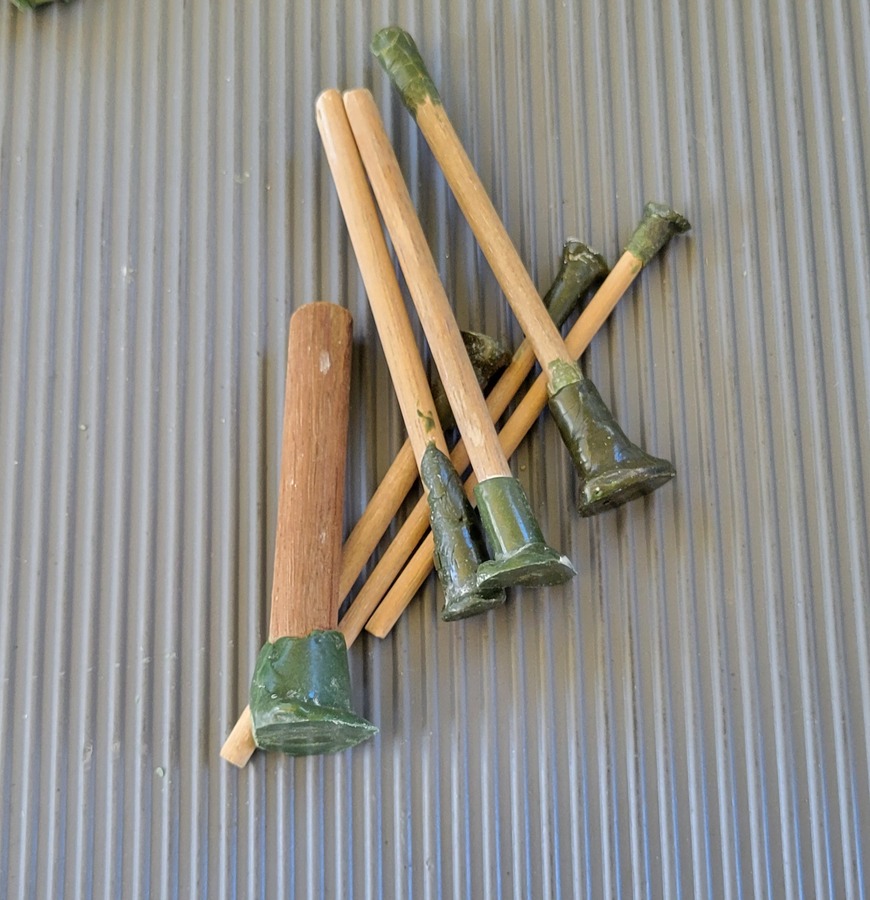
Dop sticks are nothing more than cut down dowel rods that you can pick up at Lowe’s or any home improvement store for less than $1.50. I think I bought three different sizes (1/4-inch, 3/8-inch and 1/2-inch); you can get whatever size fits your needs. They will last forever.
Dop Wax
There is often confusion about dop wax, because novice cabbers don’t know what the colors mean.
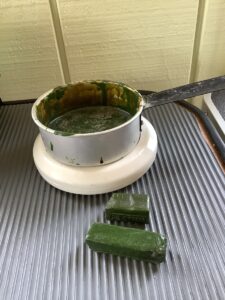
Novice cabbers often don’t know the proper way to use dop wax either.
Although some lapidaries use epoxy or cyanoacrylates adhesive (super glue); most professional cabbers and faceters, for that matter, and many old-timers like me still use dop wax. Depending on the heat sensitivity of a stone, green works for most cabbing material and red for most faceting material. I included the brown and black waxes below because some cutters use them. I doubt you will ever need them.
Four Types of Dop Wax
- Green: Typically used for cabbing; softens at approximately 65°C or 150° F (for soft stones such as opal)
- Red: Also used for cabbing; softens at approximately 70°C or 160°F
- Brown: Used for faceting; softens at approximately 74°C or 165°F
- Black: Used for faceting; softens at approximately 77°C or 170°F
Dop Pot
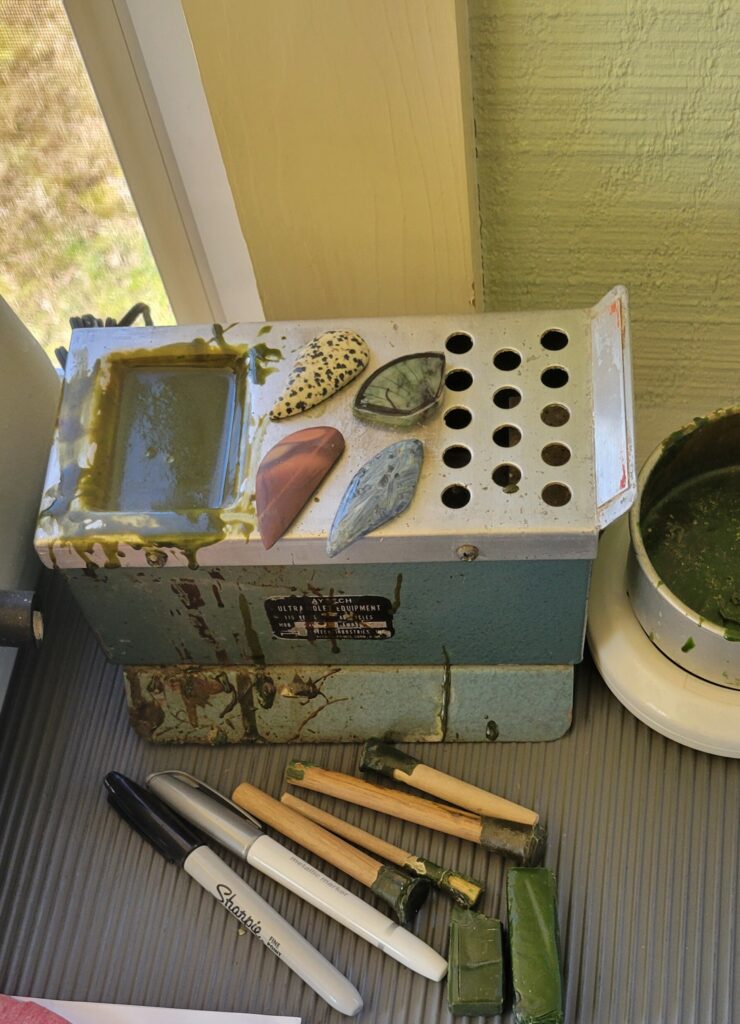
A dop pot is simply a container for softening or melting dop wax. For years I used the small pan from a single-egg poacher and just put it on a coffee cup warmer; I was all in at a cost of about 6 bucks. I must have used that setup for 20 years. Then my club was getting rid of their old units that used a 40-watt incandescent light bulb to heat the wax. I picked that up for $5; I still use it today. But if you want the latest tech, I’d pony up the $34.99 for a good electric dop pot from Kingsley North Lapidary & Equipment Supplies. I also keep an alcohol lamp on hand in case I need to adjust a stone.
(Tip: Buy from a lapidary supply vendor. I found that Amazon is at least $10 more expensive. Here’s another tip, you may qualify for a discount from companies like Kingsley North if you do regular business with them; it never hurts to ask.)
Magnification
Any sort of magnification will do. I use either a jeweler’s loupe (10X power, under $10) or a Grobet LED Headband Magnifier (3-10X power, $29.99) which has replaced my Optivisor (3X magnification, about $55). I prefer the loupe because the high magnification makes it easier to see scratches and cracks in a stone. There are other brands and types out there; all at various price points.
Templates
There are templates for any shape or size of standard mountings (ex. An 8X10 mm oval for rings and pendants or a large 30X40 mm oval for pendant settings). You can get them in plastic or aluminum. They aren’t expensive.
Marking Pen or Stylus
I use a stylus or felt tip permanent marker when I use a template for calibrated stones. For years I used an aluminum or brass stylus, because they make a very thin, but easily seen, line. However, as I’ve aged—and, honestly, gotten a bit lazy—I use a permanent marker. I use a thin tipped black marker or a regular tipped marker in a metallic color. I find the metallic colors work really nicely with dark stones where a stylus or black marker are difficult to see even with plenty of light (probably an age thing, too).
Eye Protection
You really, really, really need to protect your eyes from errant shards of flying rock. Let me repeat: really, really, really! It doesn’t matter what you use. As long as your eyes are covered from flying rock bits. This is especially true when using your trim saw. Eye protection also helps protect your eyes from saw spray. I use a SAS SAFETY CORP Adjustable Face Shield ($20 from Harbor Freight), but there are plenty of other options. Pick one, it doesn’t matter as long as your eyes are safe.
Shop Apron
To keep your clothes dry and free from getting covered with saw oil (trust me, a slab saw has played this little trick on me a time or two…or more), there is nothing like a vinyl shop apron. You can get them for less than $10 from any lapidary supplier.
Very informative for a person stating out cabs
Lloyd,
I so appreciate your comment. As a long time cutter and collector, you know what it takes to put together and maintain a lapidary shop.
Thank you for dropping by.
Don’t forget a respirator. Some of the stones have nasty chemicals you don’t want to breath.
Hi Ed,
Thanks for visiting my site. When I’ll include a respirator when I update this post. Respirators are important when cutting material such as malachite as a fair ew others. Since I’ve worked mostly in opal, jade and quartz-based material for the last 50-odd years and use plenty of water, I don’t wear one so I tend to forget about them
Cheers,
John